Over the years, your bathroom exhaust fan will put in a lot of work for you. For something we use every day, even multiple times a day, bathroom fans tend to go largely unnoticed until you start hearing noises or it stops working. Whether it’s working louder than normal or the fan stopped working altogether, there’s still hope for your bathroom fan.
Here’s how to oil a bathroom exhaust fan:
- Shut off power to the bathroom.
- Remove the cover and fan.
- Clean the fan and all its parts.
- Apply oil to the fan.
- Reinstall the fan.
Following these simple steps can get your bathroom fan working like new. Let’s take a closer look at each part of the process and how you can prevent a fire that comes from accumulated dust and grime.
1. Shut Off Power to the Bathroom
For your safety, it’s vital to shut off the power to the bathroom before oiling your fan, but this isn’t as simple as turning off the lights and making sure the fan is off. The safest way is to turn off the breaker to your bathroom, which cuts off all electricity to the room temporarily.
When you’re oiling your bathroom fan, you’ll most likely need to remove some of the wires from the fan to do it properly. Never mess with wires when the power isn’t shut off.
You’re putting yourself at great risk of being electrocuted and injured.
Be warned that repeatedly flipping your breaker can be harmful over time. So, don’t make this a regular occurrence in your home. But don’t worry too much about doing it once every now and then in order to clean your fan.
Safety is always the first priority.
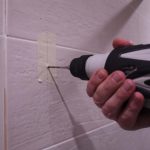
2. Remove the Cover and Fan
The plastic cover that’s over your bathroom fan isn’t normally screwed down. In fact, most of the time, all you need to do is pull down on the cover, and it’ll come right off the ceiling. Don’t pull down too far, though, as it’ll be attached to the ceiling with clips.
Pull down the cover a few inches and start looking for the clips. Once you find them, detach the cover and move them out of the way.
Once the cover is moved, it’s time to get the fan out so you can reach the motor. Your fan will be clipped in just like the cover, but it should also be screwed in to prevent slipping. Remove the clips and the screws to take out the fan.
Once the fan is removed, you’ll need to disconnect the wiring to move it fully.
This part could pose a risk to your safety if you didn’t follow the first step. To fully remove the fan to reach the motor, you’ll need to disconnect any wires that are attached to the fan. Most of the time, this will be a simple process.
Most fans are connected to two wires. Once you remove these wires, it’ll be easy to get them back in the right place because they’re color-coded. If they’re not, which is unusual, you’ll need to be able to remember which wire goes where. Again, this will be a rare problem as most wires will be clearly marked.
Once you’re sure that you can correctly replace the wires, disconnect them and fully remove the fan.
3. Clean the Fan and All Its Parts
Once you have the fan fully removed, now is a great time to clean it.
Like everything else around the house, the bathroom fan can accumulate a lot of dirt and dust over time. Cleaning it regularly may not be easy because it’s usually connected to electricity, so you’ll want to take advantage of this time and clean it thoroughly.
It’s important to clean the fan and parts before you oil.
Though it may be easier to skip this step and go right for oiling, this isn’t the best option. The oil helps your fan run better, but the dirt and dust can cause the fan to be dry, which may make your oil treatment not last as long.
Also, remember that any dirt and dust left in the fan is circulated throughout the room during every use. So, cleaning it is the best option.
The fan can be cleaned using a damp paper towel and dish soap, but make sure it’s completely dry before reassembling, as the water, soap, and oil won’t mix well. So, remember to thoroughly rinse and dry your fan and all parts before continuing.
If a lot of dirt and dust has accumulated, it’s okay to use a brush to clean the fan and its components. Just make sure you’re careful not to bend or damage anything.
Make sure all parts are thoroughly cleaned and dried before continuing.
4. Apply Oil to the Fan
Now that we’ve properly disassembled and cleaned the fan, it’s time to apply the oil. Just applying oil to the fan itself isn’t enough, because while this will help temporarily, if you want this to last a while, make sure all your bases are covered.
Ensure you apply oil to the oil wick bearing, which holds oil and allows it to be spread while the fan is in use.
The oil wick bearing has a soft piece that sticks out, which is the part that needs to be oiled. It’ll resemble cotton or another soft fabric. Apply the oil to this part to ensure that it’s full and can dispense oil as needed.
5. Reinstall the Fan
Once the fan and its parts are thoroughly oiled, it’s time to put it all back together.
Soak up any excess oil first, so the fan isn’t dripping, then begin putting it back together. Once you have the fan assembled, if it was taken apart, then carefully reconnect the wires, ensuring that the power in the bathroom is still turned off.
Once the wires are properly re-attached, you can begin inserting the clips and screwing the fan back into place. This will probably be easier than removing it because you already know where everything goes.
You’ll also be able to see it a lot better with the dust and dirt cleared out.
Once you have reinstalled the fan, make sure you take the time to clean the cover. Just like all the other parts of the fan, it’ll get dirty. So, before putting it back, just clean it with a damp cloth and some dish soap for more stubborn dirt.
Once that’s done and it’s dry, clip the cover back into place, and you’re ready to go.
Make sure you turn the power to the bathroom back on and try your newly oiled fan to see the difference it made. Not only should it be working better than before, but if there were any strange sounds, those should be gone by now.
What Are the Dangers of Not Oiling Your Bathroom Exhaust Fan?
Not oiling your bathroom exhaust fan can cause your fan to stop working or even start a fire in your home. It’s important to always keep your bathroom fan cleaned and oiled properly. If you notice any strange sounds, make sure to address them right away to prevent an accident or further damage.
Dust and dirt that naturally accumulate can dry out the fan and cause it to overheat.
You don’t need to go through the same steps above to clean the fan, as it’s not as intricate as applying oil. Make sure you’re wiping the fan down and using compressed air to get a lot of dirt and dust out of there.
A Fire Can Start
Overheating can cause damage to the fan or a fire if not caught in time.
The problem is that most fans are rarely cleaned, and fire can catch and spread quickly among dirt and dust. Some of the dust in the fan includes microscopic pieces of toilet paper, which is highly flammable should a fire start.
Fans Can Overheat
Oil can help your fan run smoothly and prevent overheating, but there are other things you can do to prevent overheating beyond oiling and cleaning.
For example, keep track of how long your fan is running. If it’s not set to a timer, it’s easy to let your fan run for extended periods, and this prolonged use can increase the chances of overheating as bathroom fans aren’t made to run permanently.
New models of bathroom fans come with thermal protection, which prevents them from overheating. This protection won’t replace oiling and cleaning, but it’ll shut the fan down if it starts to overheat.
It’s a great feature to have, especially if your fan isn’t set on a timer.
Final Thoughts
Oiling your bathroom exhaust fan can prevent further issues, such as breaking down or house fires, down the road. So, follow the simple steps stated in this article to get the job done quickly and efficiently.
Remember, strange noises with a bathroom fan aren’t normal. So, address them quickly before it escalates.